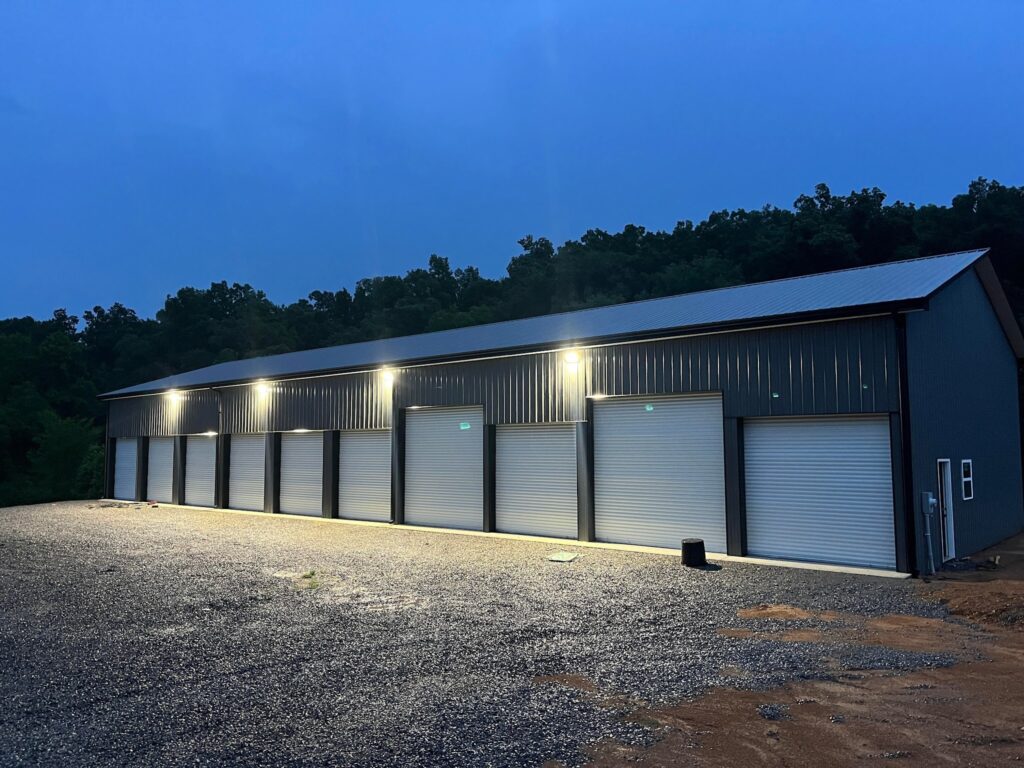
Outdoor lighting serves as the first line of defense for commercial properties, directly influencing safety, security, and the overall impression a space makes on visitors and tenants. Yet many facilities still operate with fixtures that cast a washed-out, yellowish hue—distorting colors, obscuring facial features, and making it difficult to identify vehicles or detect hazards in parking areas and walkways. The root cause is often low Color Rendering Index lighting that fails to reveal the true appearance of objects under illumination. High CRI outdoor light fixtures solve this problem by rendering colors with near-daylight accuracy, dramatically improving how people perceive their surroundings after dark. For contractors tasked with delivering reliable, high-performance lighting systems, understanding how to leverage High CRI technology is essential. This article breaks down the science behind CRI, explores targeted applications like parking lot lights and dusk-to-dawn systems, and provides a practical guide for selecting and installing outdoor light fixtures that maximize visibility while meeting energy and maintenance goals.
Table of Contents
Understanding High CRI Outdoor Light Fixtures: The Foundation of Clear Visibility
Color Rendering Index measures how accurately a light source reveals the true colors of objects compared to natural sunlight, which scores a perfect 100. Most standard outdoor fixtures—particularly older high-pressure sodium or basic LED models—operate in the 60-70 CRI range. At this level, reds appear muddy, greens look gray, and skin tones take on an unnatural cast. High CRI lights, typically rated 80 and above, close this gap significantly. Fixtures rated at 90+ CRI reproduce colors with near-daylight fidelity, making it possible to distinguish between a dark blue jacket and a black one, or to clearly read colored signage from a distance.
The practical difference extends beyond aesthetics. When colors render accurately, the human eye processes visual information faster. Security personnel can identify clothing descriptions that match dispatch alerts. Drivers navigating parking structures can spot pedestrians wearing dark clothing against shadowed backgrounds. Property managers also benefit from enhanced curb appeal—landscaping looks vibrant, building facades display their intended tones, and retail storefronts maintain brand-consistent color presentation even after sunset. For contractors, specifying high CRI lights demonstrates a commitment to performance-driven design rather than simply meeting minimum illumination thresholds.
How CRI Impacts Safety and Security in Outdoor Spaces
Surveillance systems are only as effective as the light illuminating the scene. Security cameras paired with low-CRI fixtures often capture footage where facial features blur together and vehicle colors become indistinguishable—rendering recordings nearly useless for identification purposes. When high CRI fixtures illuminate the same areas, camera footage captures sharper contrasts between skin tones, hair color, and clothing details. Law enforcement agencies have noted that witness descriptions align more closely with recorded footage under high-CRI illumination, accelerating incident resolution.

In commercial settings, the safety benefits compound. A distribution center operating with 90+ CRI lighting across its loading docks reported fewer forklift incidents because operators could more easily distinguish between floor markings, safety cones, and personnel vests. Retail plazas using high CRI fixtures in their walkways found that slip-and-fall claims decreased when patrons could clearly see wet surfaces, uneven pavement transitions, and curb edges. These outcomes translate directly into reduced liability exposure for property owners—a compelling argument contractors can present during project proposals.
Optimizing Area Illumination with Targeted Fixtures: Parking Lot Lights and Beyond
Effective area illumination requires more than simply flooding a space with light—it demands strategic fixture placement and selection tailored to each zone’s specific function. A well-designed parking lot operates differently from a pedestrian pathway or a building perimeter, and the lighting approach must reflect those differences. Parking lots need broad, uniform coverage that eliminates dark pockets between vehicles while controlling glare that could temporarily blind drivers. Pathways require lower-mounted fixtures with tighter beam angles that guide foot traffic without spilling light into adjacent properties. Perimeter zones benefit from wide-throw fixtures mounted at moderate heights to create a continuous band of illumination that deters unauthorized access.
Parking lot lights represent one of the most demanding applications in commercial outdoor lighting. These fixtures must deliver consistent illumination across vast horizontal surfaces while withstanding wind loads, temperature extremes, and years of continuous operation. Light distribution patterns matter enormously here—a Type III or Type V distribution ensures coverage extends symmetrically across driving lanes and parking stalls without creating harsh bright spots directly beneath poles and dim zones between them. Glare control through shielded optics protects drivers’ eyes during the critical moments of navigating between parked vehicles and pedestrians. Durability requirements include impact-resistant lenses, corrosion-proof housings, and thermal management systems that maintain LED performance through summer heat cycles. For contractors managing area illumination projects, matching the right outdoor light fixture to each zone eliminates costly callbacks and ensures the finished installation performs as designed from day one.
Selecting the Best Parking Lot Lights for Commercial Projects
Choosing parking lot lights for a commercial project starts with understanding the relationship between mounting height and lumen output. Fixtures mounted on 20-foot poles require different optical configurations than those at 30 feet—higher mounts need narrower beam angles to push light downward effectively, while lower mounts can use wider distributions without sacrificing uniformity. A small retail lot with 15-foot poles might perform well with 20,000-lumen fixtures spaced at 60-foot intervals, while a large distribution center lot with 35-foot poles demands 60,000+ lumen fixtures with precision-engineered reflectors to maintain adequate foot-candle levels at ground level.

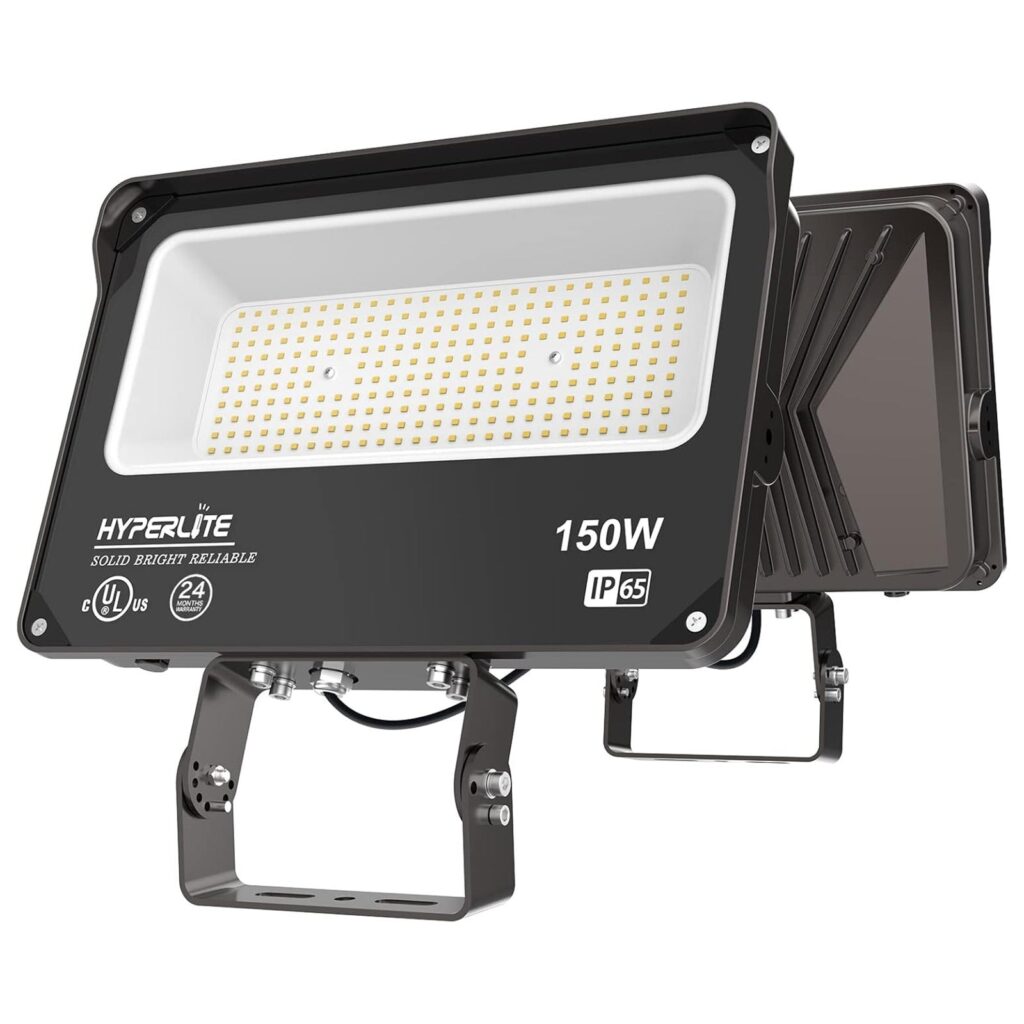
LED technology has transformed parking lot lighting by offering tunable optics, instant-on performance, and dramatically longer service life compared to legacy metal halide or high-pressure sodium systems. Manufacturers like Hyperlite offer fixtures with field-adjustable wattage settings that allow fine-tuning after installation—this flexibility proves invaluable when as-built conditions differ slightly from design calculations. Surge protection rated at a minimum of 10kV safeguards the investment against electrical transients common in exposed outdoor installations. Contractors should also verify that selected parking lot lights carry appropriate certifications for the installation environment and confirm compatibility with the pole arm configurations already specified in the project documents.
Implementing Dusk-to-Dawn Operation for Efficiency and Convenience
Automated lighting control eliminates one of the most persistent maintenance headaches in commercial outdoor installations—manually adjusting timers as seasonal daylight patterns shift. Dusk-to-dawn operation relies on integrated photocell sensors that continuously monitor ambient light levels, activating fixtures precisely when natural light drops below a preset threshold and deactivating them at sunrise. This seamless automation ensures properties remain illuminated exactly when needed without staff intervention or outdated timer schedules that leave lots dark during early winter evenings or waste energy by running fixtures well past dawn in summer months.
The energy savings from dusk-to-dawn operation are substantial. Unlike timer-based systems that require quarterly adjustments to track sunrise and sunset changes, photocell-driven fixtures respond to real-time conditions—automatically compensating for overcast days when darkness arrives early or bright summer evenings when illumination isn’t needed until later. This responsiveness typically reduces annual operating hours by 8-12% compared to poorly maintained timer systems. Security also benefits directly, since there’s never a gap between darkness falling and lights activating. Properties with dusk-to-dawn systems eliminate the vulnerability window that occurs when timers fall out of sync with actual conditions, ensuring continuous coverage that deters trespassing and vandalism.
Integrating Sensors with High CRI Fixtures for Smart Lighting Systems
Successful photocell integration starts with sensor placement. Mount photocells on the north-facing side of fixtures or poles to prevent direct sunlight exposure from causing erratic cycling, and position them away from other artificial light sources that could trick the sensor into premature shutoff. Most commercial-grade high CRI fixtures accept twist-lock photocell receptacles that allow tool-free sensor replacement without disturbing wiring connections—a design feature contractors should prioritize for long-term serviceability. When pairing sensors with LED fixtures, verify the photocell’s minimum load rating is compatible with the fixture’s low wattage draw, as some older photocells designed for HID ballasts may not switch reliably with efficient LED drivers. Schedule annual photocell inspections to clean lens surfaces and confirm proper switching response, since dirt accumulation or lens yellowing can delay activation times and compromise the security benefits that dusk-to-dawn operation is designed to provide.
A Contractor’s Practical Guide: Choosing and Installing Outdoor Light Fixtures
Delivering a lighting installation that performs flawlessly for years requires a systematic approach that accounts for site-specific variables, fixture specifications, and long-term serviceability. Contractors who follow a structured selection and installation process avoid the common pitfalls that lead to uneven coverage, premature failures, and dissatisfied clients. The process begins well before any fixture ships to the jobsite—it starts with understanding what each outdoor light fixture needs to accomplish within the broader site design.
Step 1: Site Assessment and Lighting Design for Different Areas
Every successful project starts with a thorough site walkthrough conducted after dark. Observe existing conditions, note areas where shadows collect, and identify surfaces that affect light reflection—dark asphalt absorbs significantly more light than light-colored concrete, requiring higher lumen output to achieve equivalent foot-candle readings. Divide the property into functional zones: vehicular circulation areas, pedestrian walkways, building entryways, loading zones, and perimeter boundaries. Each zone carries different illumination requirements defined by IES standards—parking areas typically need 1-5 foot-candles at ground level, while building entries may require 5-10 foot-candles for adequate facial recognition at access control points.
Map pole locations and mounting heights against the manufacturer’s photometric data to confirm that spacing achieves the required uniformity ratio. A uniformity ratio below 4:1 (maximum to minimum) prevents the disorienting bright-dark-bright pattern that causes eye fatigue and masks hazards in transition zones. For each zone, specify CRI requirements based on function—areas monitored by surveillance cameras or frequented by pedestrians warrant 80+ CRI minimum, while purely utilitarian zones like rear service corridors may accept slightly lower ratings. Document the IP rating needed for each outdoor light fixture location, accounting for exposure to direct rain, dust from adjacent construction, or salt spray in coastal environments. IP65 serves most commercial applications, while fixtures in wash-down areas or coastal sites should meet IP66 or higher.
Step 2: Installation and Maintenance Best Practices
Proper installation determines whether a fixture achieves its rated lifespan or fails prematurely. Run all outdoor wiring through rated conduit with appropriate burial depth—typically 18 inches for direct-burial UF cable or 6 inches for conduit-protected circuits, though local codes take precedence. Torque all electrical connections to manufacturer specifications and apply anti-oxidant compound on aluminum-to-copper transitions to prevent galvanic corrosion that increases resistance over time. When mounting fixtures to poles, confirm arm orientation aligns with the designed photometric pattern—a fixture rotated even 15 degrees from its intended aim point can shift coverage enough to create dark spots in critical areas.
Seal all junction points with listed weatherproof connectors and verify ground continuity from fixture housing back to the service panel. After energizing the system, take field measurements with a light meter at multiple points across each zone to confirm that designed foot-candle levels match actual performance. Document these baseline readings for the client’s maintenance records. Establish a maintenance schedule that includes annual lens cleaning to prevent lumen depreciation from dirt accumulation, photocell function verification at each seasonal transition, and driver inspection every three years. This proactive approach preserves the visibility advantages that high CRI outdoor light fixtures deliver and protects the client’s investment against gradual performance degradation that often goes unnoticed until a safety incident occurs.
Maximizing Commercial Property Safety with High CRI Lighting
High CRI outdoor light fixtures represent a measurable upgrade in how commercial properties perform after dark—transforming spaces from dimly lit liability zones into clearly visible, secure environments where people feel confident navigating. The difference between a 65 CRI fixture and a 90+ CRI fixture isn’t subtle; it’s the difference between security footage that identifies a suspect and footage that captures only a blurred silhouette. When paired with dusk-to-dawn operation, these systems deliver continuous protection without manual oversight or wasted energy from outdated timer schedules. Proper area illumination through well-selected parking lot lights ensures that every stall, driving lane, and pedestrian crossing receives the coverage it demands—eliminating the dark pockets where incidents occur and complaints originate. Contractors who apply the site assessment, fixture selection, and installation practices outlined here position themselves to deliver projects that exceed client expectations on safety, aesthetics, and long-term reliability. The investment in specifying the right outdoor light fixture for each application pays dividends through reduced maintenance callbacks, lower liability exposure for property owners, and installations that continue performing at designed levels years after commissioning.
-

-

-

-
-

-