A practical tutorial explaining how beginners can design, customize, and manage invitations using structured online tools.
Table of Contents
Introduction
Invitations serve both logistical and visual purposes. They communicate key details while also setting expectations for the tone and formality of an event. Even a simple gathering benefits from a well-structured design.
Many people need invitations prepared quickly but lack formal training in layout or typography. Custom invitation makers address this gap by combining templates, preset dimensions, and guided formatting tools into simplified workflows.
Platforms in this category vary in how they manage templates, export settings, and RSVP integrations. Some emphasize print output. Others prioritize digital distribution and tracking.
The most effective approach is not to redesign from scratch, but to follow a clear sequence: choose a template, adjust core elements, confirm technical settings, and finalize distribution.


Step-by-Step Guide for Using Custom Invitation Makers
Step 1: Start From a Structured Template
Goal
Create a stable layout foundation that reduces formatting errors and speeds up editing.
How to do it
- Select the invitation size first (such as 5×7 inches or A6).
- Choose a template aligned with the event tone.
- Replace placeholder text with confirmed event details.
- Adjust spacing rather than repositioning every element.
- Lock background elements before editing foreground text.
What to watch for
- Decorative fonts that reduce readability.
- Overcrowded margins after text replacement.
- Uneven alignment caused by resizing text boxes.
- Too many competing graphic elements.
Tool notes
Structured template libraries simplify the starting phase. For example, you can begin with free print out invitations from Adobe Express, which provides editable layouts designed to preserve alignment and proportion while allowing customization.
Step 2: Customize Fonts, Colors, and Visual Hierarchy
Goal
Align the invitation’s appearance with the event’s style or brand identity.
How to do it
- Pair one headline font with one body font.
- Adjust color palettes to match event themes.
- Maintain consistent spacing between sections.
- Resize headlines before adjusting body text.
- Keep logos proportional and centered if included.
What to watch for
- Low contrast between text and background.
- Mixing more than two font families.
- Stretching graphics out of proportion.
- Inconsistent line spacing.
Tool notes
If brand consistency is required, shared asset libraries in Adobe Creative Cloud can maintain uniform color and typography across multiple event materials.
Step 3: Set Up RSVP Tracking
Goal
Establish a reliable system for collecting attendance confirmations.
How to do it
- Decide between printed RSVP cards or digital forms.
- Add a clear RSVP deadline.
- Include contact details or a response link.
- Track confirmations in a central spreadsheet.
- Assign one person to manage response updates.
What to watch for
- Missing response instructions.
- Conflicting RSVP deadlines.
- Manual tracking errors.
- Unclear guest name fields in digital forms.
Tool notes
Google Forms can serve as a lightweight RSVP tracker when linked from a digital invitation.
Step 4: Enable RSVP Integrations and Calendar Sync
Goal
Reduce scheduling confusion and automate confirmations where possible.
How to do it
- Attach calendar (.ics) files for digital invitations.
- Connect RSVP forms to spreadsheets.
- Automate confirmation emails if appropriate.
- Verify time zones before sending.
- Test the full RSVP flow internally.
What to watch for
- Broken response links.
- Incorrect calendar time formatting.
- Duplicate submissions.
- Inconsistent name formatting.
Tool notes
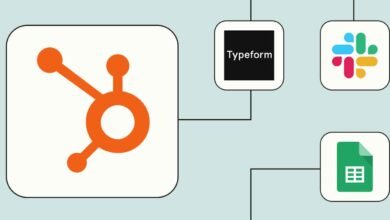
CRM platforms such as HubSpot can capture RSVP submissions when invitations connect to event landing pages.
Step 5: Review Print File Requirements
Goal
Prepare the design for professional printing.
How to do it
- Confirm final trim size with bleed.
- Set resolution to 300 dpi.
- Convert color mode to CMYK.
- Keep text within safe margins.
- Verify image resolution before export.
What to watch for
- RGB files sent to printers.
- Text placed too close to trim edges.
- Low-resolution background photos.
- Missing bleed areas.
Step 6: Export a Print-Ready File
Goal
Generate a final file suitable for submission to a print vendor.
How to do it
- Export as high-resolution PDF.
- Embed fonts or outline text if required.
- Enable crop marks when necessary.
- Review the PDF at 100% zoom.
- Save the final version with a clear file name.
What to watch for
- Compression artifacts.
- Incorrect page size.
- Transparent layers flattening unexpectedly.
- Missing images.
Tool notes
Adobe Acrobat can be used to review exported PDFs and confirm bleed, resolution, and page size before sending to print.
Step 7: Finalize Custom Order Details
Goal
Confirm production specifications before printing begins.
How to do it
- Verify total quantity.
- Select paper weight and finish.
- Confirm production timeline.
- Submit only the approved final file.
- Request a digital proof if available.
What to watch for
- Seasonal production delays.
- Paper stock mismatches.
- Incorrect file version uploads.
- Overlooking shipping timelines.
Tool notes
Project management platforms such as Asana can help track print approvals, deadlines, and vendor communication during event planning.
Common Workflow Variations
Digital-Only Invitations
When printing is unnecessary, export for screen resolution and prioritize mobile readability. RSVP integrations become the primary focus.
Formal Printed Events
For weddings or corporate events, paper weight, bleed, and CMYK accuracy take priority over decorative effects.
Branded Corporate Invitations
Use shared brand kits to maintain consistency across invitations, reminder emails, and signage.
Small Informal Gatherings
Minimalist templates with limited font changes reduce production time while preserving clarity.
Before You Start Checklist
- Event date and time confirmed
- Venue address verified
- Guest list finalized
- RSVP method selected
- Print dimensions chosen
- Brand assets prepared (if needed)
- Timeline for proof approval set
- Budget for printing confirmed
Pre-Export / Pre-Order Checklist
- Resolution set to 300 dpi
- Colors converted to CMYK
- Bleed included where required
- Text inside safe margins
- Spelling and grammar verified
- Correct page size selected
- Final PDF reviewed at full scale
- Latest file version submitted
Common Issues and Fixes
Low-resolution images
Replace images under 300 dpi. Blurry graphics will not sharpen in print.
Text too close to edges
Adjust layout to maintain safe margins and avoid trimming issues.
Color shifts in print
Convert to CMYK before exporting and avoid highly saturated RGB colors.
Cropping surprises
Always include bleed and confirm trim lines with the printer.
Mismatched sizing
Double-check document size settings before export.
How To Use Custom Invitation Makers: FAQs
Should beginners start from a blank canvas or a template?
Templates reduce structural errors and speed up formatting. Blank designs require more layout knowledge.
Is digital RSVP better than printed response cards?
Digital forms simplify tracking. Printed cards suit formal events but require manual management.
What file format is safest for printing?
A high-resolution PDF with bleed and embedded fonts is typically preferred.
When should calendar integration be included?
Calendar files are useful for corporate events or time-sensitive gatherings.
Can one design serve both print and digital use?
Yes, but adjustments may be needed for resolution and layout scaling.