Fleet managers, business owners, and operations teams often approach vehicle branding as a straightforward purchasing decision. You buy a wrap kit, follow the instructions, and the job gets done. In practice, the gap between a finished installation and a professional one shows up quickly — in bubbling edges after a week of sun exposure, in misaligned lettering across a panel seam, or in vinyl that lifts at the corners the moment temperatures drop.
The instructions included with consumer-grade graphic kits are written to minimize returns, not to ensure longevity. They don’t account for the real variables involved in applying graphics to vehicles that operate daily in changing conditions. What follows is a practical breakdown of what actually happens during a professional installation — and why those steps matter far more than most buyers realize before committing to a DIY approach.
Table of Contents
1. Surface Preparation Goes Well Beyond a Quick Wipe-Down
Working with a qualified vehicle graphics installer means the job starts long before any vinyl is unrolled. Surface preparation is the single most important factor in how long a graphic holds — and it’s the step that DIY kits consistently underestimate. Kits typically recommend wiping the panel with isopropyl alcohol. Professionals treat that as one step in a multi-stage process.
Why Surface Chemistry Matters Before Application
Vehicle panels carry residue from manufacturing compounds, road-use contaminants, wax coatings, and previous adhesive. Even a visually clean surface may have chemical layers that prevent vinyl adhesion at a molecular level. A professional will inspect the surface, use appropriate cleaning agents in a specific sequence, and allow proper drying time before any material is introduced. On older vehicles or those with resprayed panels, the preparation stage may also involve identifying areas where the underlying paint is compromised — because vinyl applied over failing paint will fail in the same way, no matter how well it’s installed.
Temperature and Environment Affect Adhesion Immediately
Professional installations are typically done in a controlled or semi-controlled environment. The ambient temperature, the surface temperature of the vehicle, and the humidity level all influence how the adhesive behaves during and immediately after application. Applying graphics in cold conditions can prevent the adhesive from bonding correctly. Applying in direct sunlight can cause the film to stretch unevenly. These aren’t variables a kit instruction sheet accounts for, because they depend on real-time assessment — something only an experienced installer can provide.

2. Material Selection Is Based on Application, Not Availability
Consumer wrap kits are sold as complete solutions, but they ship with materials that have been chosen for general use and cost efficiency. A professional installer selects materials based on the specific vehicle, the application type, and the operating environment the vehicle will face after the job is done.
Cast vs. Calendered Vinyl Behaves Differently in Real Conditions
The distinction between cast and calendered vinyl films is well established within the industry, and it directly affects how graphics perform on complex vehicle surfaces. Cast films are made through a process that allows them to conform more effectively to curved panels, recessed areas, and compound curves without significant tension in the material. Calendered films are more rigid and are better suited to flat surfaces. A professional knows which material is appropriate for which vehicle geometry — a choice that DIY kits rarely give the buyer enough information to make correctly.
Overlaminate and Finish Choices Affect Durability
On commercial vehicles that operate in demanding environments — delivery fleets, utility trucks, equipment haulers — the topcoat applied over printed graphics makes a substantial difference to lifespan. Professionals select overlaminates with UV resistance ratings appropriate to the climate, gloss or matte finishes suited to the brand application, and thicknesses that protect against light abrasion without affecting the visual quality of the print. These decisions are made before installation begins and are not part of any consumer kit workflow.
3. Panel Mapping Prevents the Mistakes That Show Immediately
Vehicle graphics that span multiple panels — across doors, wheel arches, or body lines — require layout planning before any cutting begins. This process, often called panel mapping or vehicle templating, is how professionals ensure that a graphic appears continuous across a surface that is physically broken by gaps, hinges, and hardware.
Every Vehicle Model Has Its Own Geometry
Even within the same make and model of vehicle, body panels can vary between production years. Doors may sit at slightly different heights. Trim lines may shift. A professional installer either uses manufacturer-specific templates or measures the actual vehicle before the graphics are produced. This prevents the most common failure in large-format vehicle branding: a design that was approved on a digital mockup but looks misaligned on the physical vehicle because the mockup wasn’t built to exact dimensions.
4. Application Technique Determines the Finished Result
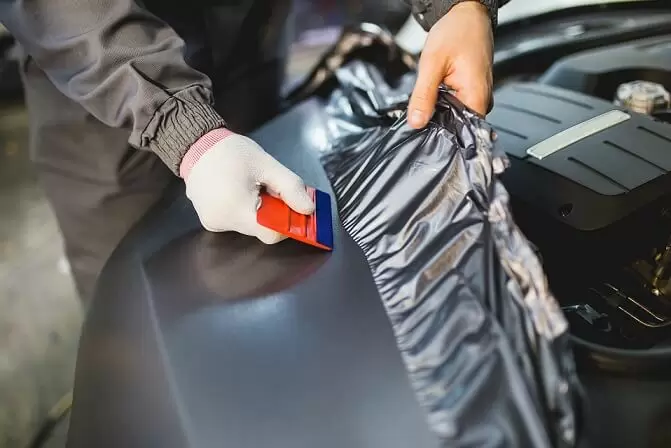
The act of applying vinyl to a vehicle surface requires consistent technique throughout the entire job. Variations in pressure, squeegee angle, heat application, and working direction create visible inconsistencies in the finished product — differences in texture, minor bubbling, or areas where the film has been stretched unevenly.
Recessed Areas and Rivets Require Specific Handling
Commercial vehicles frequently have riveted panels, door handles, mirrors, vents, and body contours that a flat graphic cannot conform to without intervention. Professionals use heat guns at controlled temperatures to relax the film into these areas, and they use precision tools to work material around hardware without tearing or creating stress points in the vinyl. Stress points in a finished wrap are among the primary causes of early edge lifting, which is the most visible sign that an installation was not completed correctly.
Seams Are Positioned Deliberately
No vehicle can be wrapped without some form of seam — a point where two pieces of material meet. Where those seams are placed determines how visible they are and how long they hold. A professional positions seams in areas where they are least likely to be noticed and least exposed to the mechanical stress that causes peeling. This includes avoiding placement over direct airflow areas on moving vehicles, which accelerates edge separation over time.
5. Post-Application Processing Completes the Bond
Once the graphic is applied, professional installers perform a post-heat process that activates the full adhesion potential of the vinyl. This step is not cosmetic. It is what distinguishes an installation that holds for years from one that begins to fail within months.
Edge Sealing Prevents the Most Common Failure Point
The edges of any vinyl graphic are the most vulnerable area. Wind, water, cleaning equipment, and temperature cycling all work at those edges over time. Professionals seal exposed edges using appropriate finishing techniques that prevent moisture infiltration and edge lifting. This is a step that takes time and care, and it’s rarely mentioned in any consumer installation guide because it requires both materials and skill that kits don’t provide.
6. Vehicle Condition Assessment Protects the Investment
Before any professional installation begins, the vehicle itself is evaluated. This assessment identifies existing damage, paint condition, surface irregularities, and prior repairs that could affect how graphics perform. According to general material science principles recognized by bodies such as the ASTM International standards organization, adhesive performance is directly tied to substrate condition — a principle that applies directly to vehicle wrap applications.
Prior Repairs and Panel Replacements Create Risk Areas
Vehicles that have been repaired or repainted carry panels where the paint system may be different from the original factory finish. These areas can behave differently under the heat used during installation and may not hold adhesive as effectively as original surfaces. A professional identifies these areas, documents them, and adjusts the installation approach accordingly — or advises the client before work begins if the surface condition poses a risk to the long-term outcome.
7. Warranty and Accountability Are Built Into the Professional Process
Consumer kits come with product warranties, not installation warranties. If the graphic fails because of how it was applied, the manufacturer of the material has no obligation to cover that outcome. Professional installers stand behind their work in a way that a kit cannot — because the result is tied to identifiable decisions made by a skilled individual, not just the properties of a product.
Documentation and Consistency Support Multi-Vehicle Fleets
For businesses operating multiple vehicles, consistency across the fleet is a practical requirement. A professional vehicle graphics installer maintains records of materials used, installation conditions, and vehicle-specific notes that allow subsequent vehicles to be completed to the same standard. This consistency is not possible with DIY approaches, where variables shift between each installation attempt and no documented process exists to reference.
Professional Work Supports Brand Standards Over Time
Fleet branding that degrades unevenly across vehicles creates a poor impression in the field. When one vehicle looks sharp and another shows edge lifting and fading after two years, the fleet as a whole reads as neglected. Professional installation, with consistent materials and process, extends the period during which the entire fleet maintains a uniform appearance — which has direct operational and reputational implications for service businesses, logistics companies, and any organization where vehicles represent the brand in the field.
Closing Thoughts
The appeal of DIY vehicle graphics is understandable. The cost savings look significant on paper, and the process appears manageable when viewed through a kit’s instructions. What those instructions don’t convey is the accumulated knowledge, environmental awareness, material judgment, and physical technique that determine whether a graphic installation actually holds up in daily service.
For businesses where vehicles are working assets — and where the appearance of those vehicles reflects directly on the organization — the difference between a professional installation and a self-applied kit isn’t just aesthetic. It shows up in how long the graphic lasts, how consistently it looks across the fleet, and whether the investment made in branding continues to deliver value two or three years after the job was completed.
Understanding what a professional actually does during an installation makes it easier to evaluate that investment clearly — not as a premium for a service you could have done yourself, but as the cost of doing the job in a way that produces a reliable, lasting result.