Microblading has surged in popularity over the past few years, attracting not only professional beauty technicians but also tattoo hobbyists eager to master the art of fine, hair-like strokes. Whether you’re drawn to eyebrow enhancement or intricate skin art, the journey begins with one critical decision: choosing the right needle. For beginners, this choice can feel overwhelming given the sheer variety of sizes, configurations, and brands available. The 0.25mm microblading needle stands out as a go-to option for newcomers, offering the precision needed to create clean lines without demanding years of experience to control.
Many beginners make the mistake of investing in equipment without understanding how needle size affects their results, or they overlook essential safety considerations that protect both the artist and the client. This article cuts through the confusion by providing clear, actionable guidance on selecting the best microblading needles, understanding essential tattoo equipment, and adopting safe practices from day one. By the end, you’ll have a confident roadmap for starting your tattooing journey with the right tools in hand.
Table of Contents
The Fundamentals of Microblading Needles and Tattoo Equipment
Microblading needles are the foundation of semi-permanent eyebrow artistry and fine-line tattooing. Unlike standard tattoo needles that puncture skin rapidly through a machine, microblading needles are arranged in a row or slope configuration on a handheld blade, allowing the artist to manually etch pigment into the upper dermis. Understanding how these needles work—and why size selection matters—gives beginners the confidence to produce consistent, professional-looking results from their earliest practice sessions.
What Are Microblading Needles?
A microblading needle consists of multiple ultra-fine pins grouped tightly together and secured to a disposable blade handle. These pins are typically made from medical-grade stainless steel, ensuring sharpness and biocompatibility. The blade configurations vary—flat rows for straight strokes, U-shaped for curved lines, and sloped arrangements for tapered effects. Unlike rotary or coil machine needles that move vertically at high speed, microblading needles rely entirely on the artist’s hand pressure and angle, making them uniquely suited for controlled, shallow work that mimics natural hair patterns.
Why Needle Size Matters: The 0.25mm Advantage
Microblading needles 0.25mm in diameter hit a sweet spot for beginners. Thinner than the common 0.30mm or 0.35mm alternatives, they produce finer, crisper strokes that closely replicate real eyebrow hairs. The reduced diameter means less pigment is deposited per pass, which is actually an advantage for newcomers—it’s far easier to build up color gradually than to correct an oversaturated line. Additionally, the 0.25mm size requires less downward pressure to penetrate the skin’s surface, reducing hand fatigue during longer sessions and minimizing the risk of cutting too deep. For anyone assembling their first set of tattoo equipment, starting with 0.25mm needles builds muscle memory around precision rather than force.
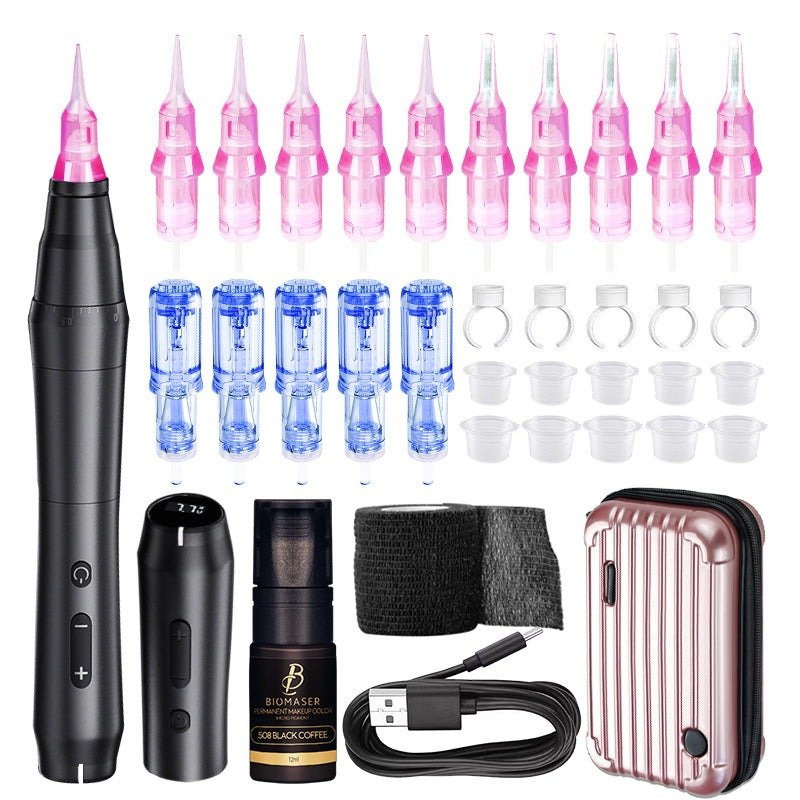
Key Factors in Choosing Starter Tattoo Equipment
Selecting your first tattoo equipment goes beyond picking up needles—it requires understanding how different components work together to deliver consistent results. For hobbyists entering the world of microblading and fine-line tattooing, the right machine paired with quality materials makes the difference between frustrating practice sessions and genuine skill development. Budget matters, but durability and compatibility with your chosen needles should drive the decision.
Types of Tattoo Machines for Hobbyists
Rotary machines and coil machines represent the two main categories beginners encounter. Rotary machines use a motor to drive the needle in a smooth, consistent motion, making them quieter, lighter, and easier to handle during extended sessions. They’re widely recommended for newcomers because they require less technical adjustment and pair well with microblading-style work when fitted with appropriate cartridges. Coil machines, while beloved by traditional tattoo artists for their power and customizable stroke, demand more mechanical knowledge to tune properly. For someone focused on fine strokes with 0.25mm needles, a pen-style rotary machine offers the most intuitive transition from handheld microblading tools to machine-assisted work.
The Importance of Stainless Steel in Equipment
Stainless steel machines aren’t just about aesthetics—they directly impact hygiene and longevity. Medical-grade stainless steel resists corrosion from repeated exposure to disinfectants and autoclaving, meaning your equipment stays sterile without degrading over time. Plastic or aluminum housings may cost less initially, but they harbor bacteria in micro-scratches and wear down quickly under regular cleaning protocols. When evaluating starter kits, prioritize stainless steel construction in both the machine body and grip, as these contact points are closest to the work area and most critical for maintaining a safe, professional environment.
Understanding Safety Standards: CE Certification and Manufacturer Warranties
Safety isn’t optional when needles break skin. Before purchasing any microblading or tattooing equipment, beginners need to verify that their tools meet recognized safety standards. Two markers worth understanding early are CE certification and manufacturer warranties. These aren’t just marketing labels—they represent tangible protections that separate reliable equipment from potentially dangerous knockoffs flooding online marketplaces.
What CE Certification Ensures for Safety
CE certification indicates that a product meets European Union health, safety, and environmental standards. For tattoo equipment, this means the materials have been tested for biocompatibility, electrical safety (in machines), and manufacturing consistency. A CE-marked microblading needle has undergone evaluation confirming that its stainless steel composition won’t leach harmful substances into skin and that each pin maintains uniform sharpness across production batches. To verify authenticity, check for a CE mark on both the product packaging and the manufacturer’s documentation—legitimate certifications include a notified body number you can cross-reference online. Avoid equipment that displays the mark only on a listing page without physical proof on the actual product.
Leveraging Manufacturer Warranties for Peace of Mind
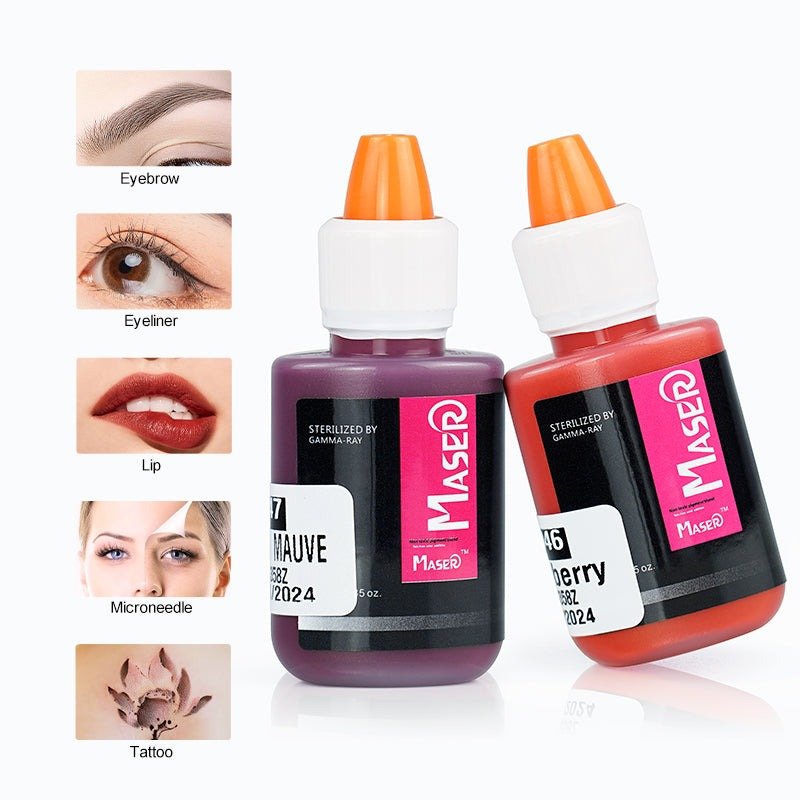
Reputable brands in the semi-permanent makeup space, such as Biomaser, back many of their products with warranties covering manufacturing defects and performance issues. For beginners, this warranty serves as a safety net—if a machine malfunctions or needles arrive with inconsistent pin alignment, you’re not stuck absorbing the cost. Register your purchase promptly, retain proof of transaction, and familiarize yourself with the warranty terms regarding what qualifies for replacement versus repair. This coverage encourages newcomers to invest in quality from the start rather than gambling on unbranded alternatives that offer no recourse when something goes wrong.
Step-by-Step Guide to Selecting Your First Microblading Needles
Knowing what makes a quality needle is one thing—actually choosing and purchasing the right one requires a systematic approach. Beginners benefit from treating their first needle purchase as a research project rather than an impulse buy. The goal is to find 0.25mm microblading needles that deliver consistent performance, fit your equipment, and come from sources you can trust for repeat orders as your skills develop.
Evaluating Needle Quality and Compatibility
Start by examining the packaging—individually sealed, sterile blister packs indicate proper manufacturing standards. Each needle should show uniform pin alignment under magnification; uneven spacing creates inconsistent strokes and increases skin trauma. Check that the blade’s tang or connector matches your specific handle or machine cartridge system, since universal fit isn’t guaranteed across brands. Run a simple sharpness test on synthetic skin before working on anything else: a quality 0.25mm needle should glide through the surface with minimal pressure, leaving a clean, hair-thin line without dragging or skipping. If you notice resistance or ragged edges in your practice strokes, the batch may be defective regardless of brand reputation.
Where to Buy Trusted Microblading Needles
Authorized distributors and manufacturer websites remain the safest purchasing channels because they guarantee authentic inventory and honor warranties. Established online platforms that specialize in permanent makeup supplies often provide batch numbers, expiration dates, and customer reviews specific to each needle configuration. Avoid generic marketplace listings where product photos don’t match actual items shipped. Local beauty supply stores catering to semi-permanent makeup professionals can be valuable for hands-on comparison, letting you inspect packaging and ask staff about compatibility with your existing equipment. Whichever source you choose, order a small quantity first to test quality before committing to bulk purchases.
Best Practices for Safe and Effective Tattooing
Owning quality equipment means nothing without disciplined safety habits. Every time a needle contacts skin—even synthetic practice skin—you’re building the routines that will define your work as either professional or reckless. Beginners who establish strict hygiene and technique protocols early avoid costly mistakes, potential infections, and the frustration of inconsistent results that stem from sloppy fundamentals.
Essential Hygiene Protocols for Beginners
Treat every practice session as if you’re working on a real client. Begin by disinfecting your entire workspace with a hospital-grade surface cleaner, then lay down disposable barrier film on any surface your hands or tools will touch. Always wear nitrile gloves—latex alternatives cause allergic reactions in some individuals—and change them whenever you touch a non-sterile object. Use only individually packaged, pre-sterilized needles and dispose of them immediately in a sharps container after each session. Never recap or reuse a microblading blade regardless of how brief the session was. Wipe your machine grip with an autoclave-safe wrap or disposable cover, and store all equipment in sealed containers between uses. These habits protect you from bloodborne pathogens and cross-contamination even during solo practice.
Techniques to Improve Precision and Control
Before touching real skin, spend weeks practicing on synthetic skin pads and citrus fruits like oranges, whose texture approximates the resistance of human dermis. Hold your 0.25mm blade at a consistent 30-degree angle and focus on uniform stroke length—aim for 1 to 1.5 centimeters per pass. Practice drawing parallel lines spaced evenly apart, gradually decreasing the gap as your steadiness improves. Anchor your working hand by resting your pinky or ring finger against the practice surface, which stabilizes movement and prevents sudden slips. Work slowly and deliberately; speed develops naturally from repetition, not from rushing. Record your sessions on video to review stroke consistency, pressure patterns, and hand positioning—visual feedback accelerates improvement faster than feel alone during the early learning phase.
Exploring Creative Tattooing with Advanced Tools
Once you’ve mastered fundamental strokes and built consistent hygiene habits, your 0.25mm microblading needles become more than a training tool—they become an instrument for creative tattooing. The precision that made these needles ideal for learning now opens doors to intricate designs that thicker needles simply cannot achieve. Fine botanical illustrations, delicate geometric patterns, and realistic feather details all become possible when your hand control catches up with your artistic vision.
Unlocking Creativity with the Right Equipment
The 0.25mm needle excels at detailed artwork because it deposits pigment in ultra-thin lines that can be layered, crosshatched, or stippled to create depth and texture. Try sketching custom designs on paper first, then transfer them to synthetic skin using a stencil. Experiment with varying your stroke pressure—lighter passes create wispy, translucent lines while firmer strokes produce bolder definition. Combine your microblading blade work with machine-assisted shading using a rotary pen fitted with shader cartridges to add dimension. This hybrid approach lets you blend the organic feel of hand-drawn strokes with smooth gradient fills, producing results that look far beyond beginner level.
Future Steps for Hobbyist Growth
As your confidence grows, expand your toolkit gradually. Introduce 0.30mm needles for bolder line work, curved blades for flowing calligraphy-style designs, and nano cartridges for machine-based fine-line tattooing. Attend workshops or online masterclasses focused on specific styles that interest you—whether that’s watercolor effects, dotwork mandalas, or realistic portraiture. Join communities of fellow hobbyists where you can share progress photos, receive constructive feedback, and discover new techniques. The equipment you’ve already invested in provides a solid foundation; creative growth comes from pushing your boundaries one design at a time while maintaining the safety standards and precision habits you built from the start.
Start Your Microblading Journey with Confidence and the Right Tools
Starting your microblading journey with 0.25mm needles gives you the precision advantage that thicker alternatives simply can’t match. These fine-diameter pins teach you control, reward patience over force, and produce results that look professional even during your earliest practice sessions. Pair them with a quality pen-style rotary machine built from stainless steel, and you have a setup that supports both learning and long-term creative growth.
Never compromise on safety standards. CE certification confirms your tools meet rigorous health and manufacturing benchmarks, while warranties from established brands like Biomaser protect your investment against defects. Verify these credentials before every purchase, buy from authorized sources, and test each batch on synthetic skin before progressing further. Equally important are the habits you build around hygiene—sterile workspaces, single-use needles, proper disposal, and gloved hands form the non-negotiable foundation of responsible tattooing.
Apply what you’ve learned here systematically: research before buying, practice deliberately, and expand your toolkit only after mastering fundamentals. Every skilled artist started exactly where you are now, and consistent effort with the right equipment transforms curiosity into genuine capability.
-
-

-

-

-
-