iTop Screen recorders have been around for a long time, but there are still a few drawbacks to utilizing these tools. There are certain projects, for example, that are unable to capture on-screen sound.
A screen recorder that can capture your screen’s video and sound, as well as let you to add your own commentary, is needed in these cases. In addition, these capabilities allow you to edit and enhance the movie at a later date.
In the event that you’d want to create a video lesson for your consumers, but you’re short on time or don’t know where to begin, a screen recorder is the best option. Screen recording software is really simple to use and requires no prior knowledge or skills.
In addition, screen recorders may be linked into a wide range of applications, from online media to video editing suites. In general, these screen recorders do the same thing, but they can provide more specific types of assistance depending on their motivation.
Online screen recorder software may be used to offer instructions on how to use sophisticated explicit things. As a YouTube user, you can easily upload videos showing you how to use various tools like Adobe Photoshop Illustrator, or WordPress. Customers will be able to see how these initiatives perform before making a financial commitment to them.
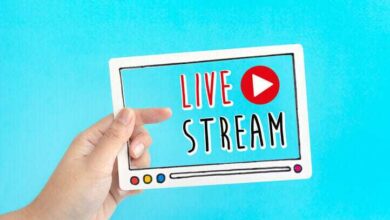
A screen recorder is a software application that captures footage of what is happening on the screen and preserves it. It is possible to create lessons and displays with this software.
How to record zoom meeting
We’ll go through the best practices for how to record zoom meeting. You may record a Zoom meeting in a variety of ways. We’ll go through some of the more creative and effective approaches we’ve come across.
The most common method is to use an external screen recorder, such as TechSmith for Mac or Camtasia for Windows. It’s like having a camera in front of you instead of just a sound and text visit, so you’ll be able to see what you’re doing on your PC.
Some notable features of Camtasia include live streaming and the ability to manage to zoom in on certain regions of the screen while recording, both of which may be valuable for pinpointing specific nuanced moments in a show or discussion for later viewing.
1. Open the Zoom app on your mobile device.
2. In the top left-hand corner of the screen, click and hold the plus symbol.
3. Fill in the meeting’s name.
4. Make this meeting distinct from any other Zoom meetings you’ve scheduled by selecting a color of your choice.
5. Connect the two players by pressing the Connect button.
6. When you’re ready to start or stop recording, just press the Start or Stop Recording buttons.
How to record screen in Windows 10 with iTop Screen Recorder
In addition to being free, iTop Screen Recorder has a number of unique features that are not available anywhere else. With an integrated video editor, this program is not difficult to use. You may capture videos in high quality with iTop Screen Recorder (4k goal).
With the help of the iTop Screen Recorder, you may record the screen on Windows 10. Downloading and installing an online screen recorder for your computer is something you really want to accomplish.
The iTop Screen Recorder will be installed on your computer and will begin recording your screen. Next, follow the procedures outlined below.
-Open iTop Screen Recorder on Windows 10 and go to the general settings tab to configure the program.
-Go to the Settings menu and configure the basics, such as the language and the location where the recording will be saved.
-If you actually want to alter the speaker, mouse, and mouthpiece in this option, you should go to the recording menu. You may also record with or without a personalized watermark on your recordings.
-You may choose whether or not to record with the camera overlay by selecting it from the webcam menu.
-It’s possible to customize the edge rate, quality, video configuration, and sound casing rate from the Format menu.
-It is possible to start, stop, and set screenshots from the alternative route key menu by pressing a handful of the alternate route keys.
-After you’ve completed the basic configurations, click the Settings tab to end it.
You have the option of recording the whole screen, a specific area, or a defined aspect ratio using this screen recorder. From the drop-down box for provincial preference, you may choose the best option.
After you’ve chosen your recording screen size, you’ll want to configure your speakers, receiver, mouse, and camera. Yes or No are the only options you have to choose from. The receiver option Yes must be selected in order to record audio to the video.
Similarly, you have the freedom to make the choices you like. There are a few things to keep in mind while looking at the components on your computer.
Conclusion
You should now understand why a few meetings are unable to function properly without the use of the iTop Screen Recorder. For the same reason, I believe you will need it if you want to create lessons for distribution on your blog, YouTube channel, or company website. This screen recorder is free to use, however it performs far better than a few premium versions.
-

-

-

-

-
-