When it comes to creating videos, screencast plays an important role. Whether you’re YouTuber, gamer, or teacher, you may already be familiar with screen recording. You can use screen recorder for Windows 10 to capture whatever happens on your computer, share it with your friends, and upload it on social media.
Table of Contents
How to Use PowerPoint to Record Screen on Windows 10
Numerous folks would be apprehensive of the Game DVR trick and many users know that the PowerPoint app offers screen recording on Windows 10. Of course, it’s not a full-fledged point, but if you want to capture the video for your presentation, it would be worth taking a shot. Follow the guidelines below to start the Windows 10 screen recorder using PowerPoint.
- Open any slide and click on the “Insert.”
- After that, select “Screen Recording.”

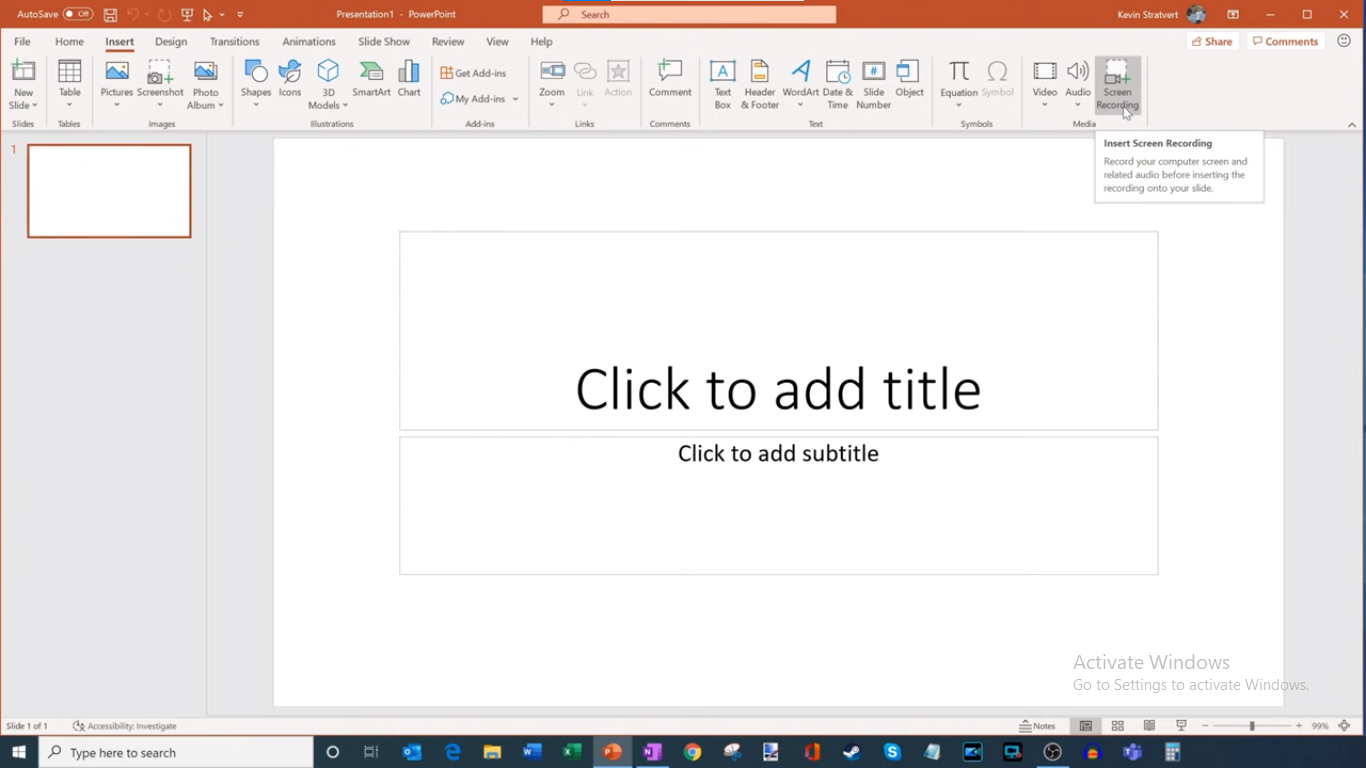
- You’ll see a control dock. Click on “Select area” and drag to choose the area.

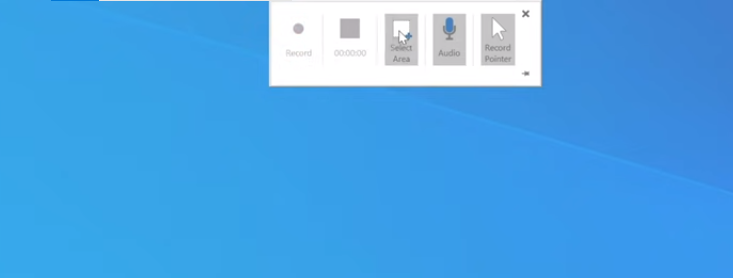
- If you want to record the entire screen, use the Windows key + shift + F key.
- After adjusting, click on the “Record Screen.”
- It will start recording with audio and a mouse pointer.
- You can also start or pause the recording using the Windows key + shift + R.
- Click “Stop” to end the recording.
How to Record Screen Using OBS on Windows 10?
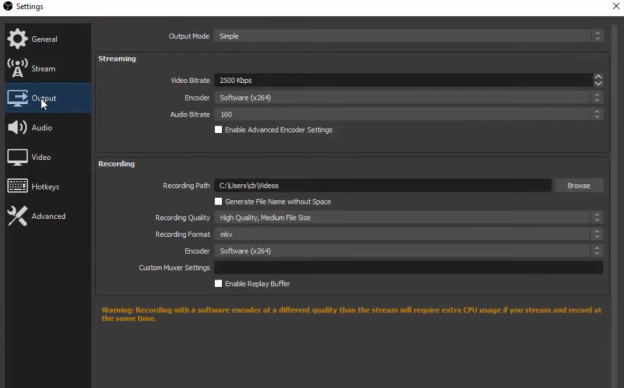
You can also record the screen using OBS studio on windows 10. For this, you’ll need to;
- Download OBS studio software by visiting the website.
- Launch it.
- Then “Click on “Settings”
- Here adjust the following elements as per your need
- Resolution
- Bitrate
- Encoder
- Streaming
After that, Click “OK”

- Under the sources section, Click on the “+” button to add the preferred source.
- Then you’ll see many options. To record the game, “Select Game capture” for capturing app, choose “Window Capture,” and for a Webcam.
- Recheck entire settings. Then click on “Start Recording.”
- Click on “Stop” to end the recording,
- Now you can access your captured content from the file menu.
How to Record the Screen with DemoCreator
Windows 10 don’t support fully-fledged screen recording, but there is a video capture software that can perform this task efficiently- Wondershare DemoCreator.
It is a desktop recording tool that enables you to record, edit and export your video. It offers multiple features. It is free web-based software and easy to use.
Features:
- Record with Camera
It allows you to capture your screen with Webcam.
- Record with Audio
You can also capture the screen with audio using a microphone.
- Record Virtually
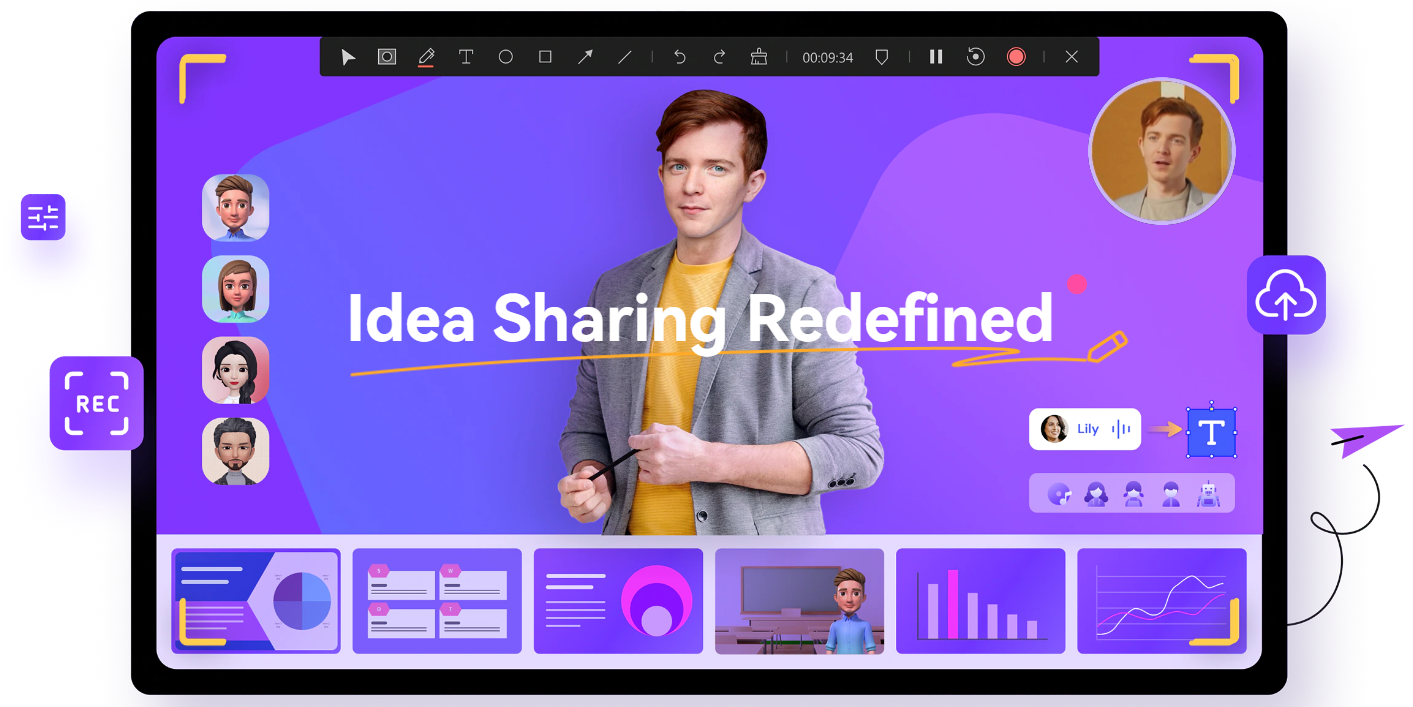
You can present virtually by adding a human avatar to the video.
- Add Stickers
DemoCreator has offered a variety of stickers that can make the content effective such as games, education, etc. Add sticker relevant to your content.
- Add Transitions
People attract more towards natural content. DemoCreator allows you to add transitions such as evaporating, fading, blur, Ripple&Dissolve, etc.
- Record Multiple Screens
It enables you to capture multiple screens simultaneously.
- Background
DemoCreator allows you to use its Green screen technology for background.
- Control Speed
You can control the video’s speed through this software. You can increase or decrease it as per your need.
- Drawing
You can use drawing tools such as lines, arrows, pens, etc.
- Spotlight
It allows you to highlight the important points by using the spotlight.
- Add Annotation
It enables you toad annotation in the video such as text, arrow, dialogue box, etc.
- Save in Multiple Formats.
You can save your created content in multiple formats; that are compatible with your device.
- Add Captions
It allows you to add captions to your video to understand the audience better. Such as Subtitle, End credit, etc.
- Crop/trim
You can split/crop/trim the video to keep the desired part in your content.
- Voiceover
It also allows you to voiceover your videos to engage more viewers efficiently.
Record with DemoCreator:
You can record your screen in Windows 10 through this tool. For this, you’ll have to
Download this Software:
All you need to do is,
- Visit DemoCreator website.
- Click on “Download”.
- After downloading, install it.
- Then launch DemoCreator.
- A pop-up will appear.
- Select “Record Screen”.

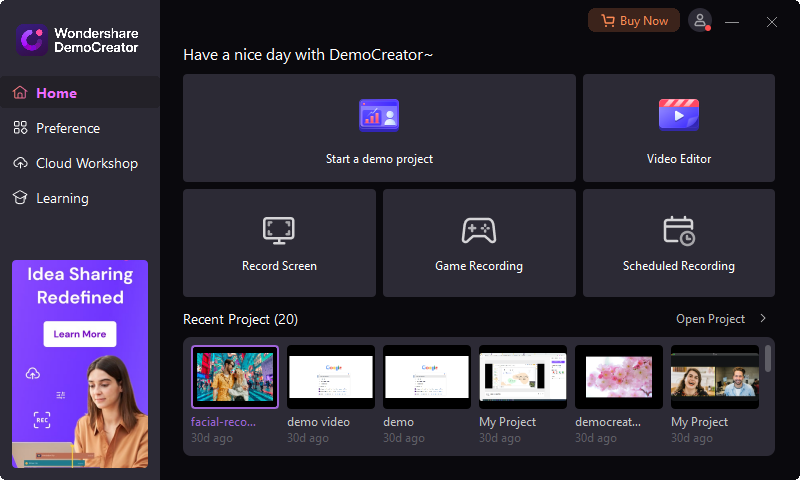
- An icon will appear where you can adjust the settings.
Set the Recording Area:
For this,
- Click on “Capture area.”

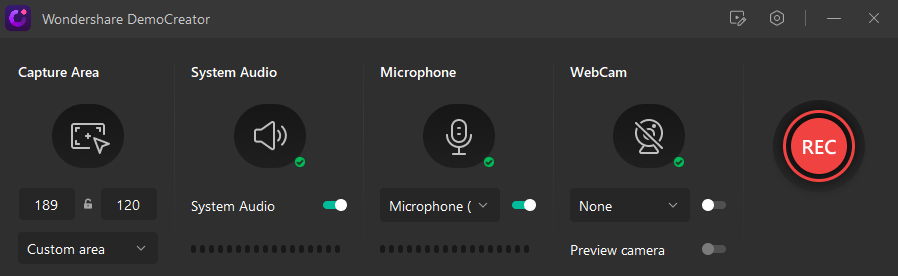
- Drag to select the area you want to record.
- You can also adjust it from the settings below the capture area.
Start Recording:
- After adjusting the settings, now click on the “Red round button” to start recording.
- You can also start/pause the recording with the F10 key.
- You can pause it by pressing the F9 key and resume it by pressing it again.
- The recording icon will appear.
Drawing Tool and Spotlight:
- In the recording icon, you will see the option of the pen.
- Click on it to see further options such as
- Pen
- Highlight
- Text
- Circle
- Rectangle
- Arrow
- line
- To highlight the specific points, you can use the spotlight.


Edit the Video:
After the recording is over, the video will automatically open in the editor interface.
- Import the video into the media library.
- Drag and drop it in the timeline to crop it.
- To make it enjoyable, add functions such as
- Annotation
- Stickers
- Transition
- Caption
- Audio


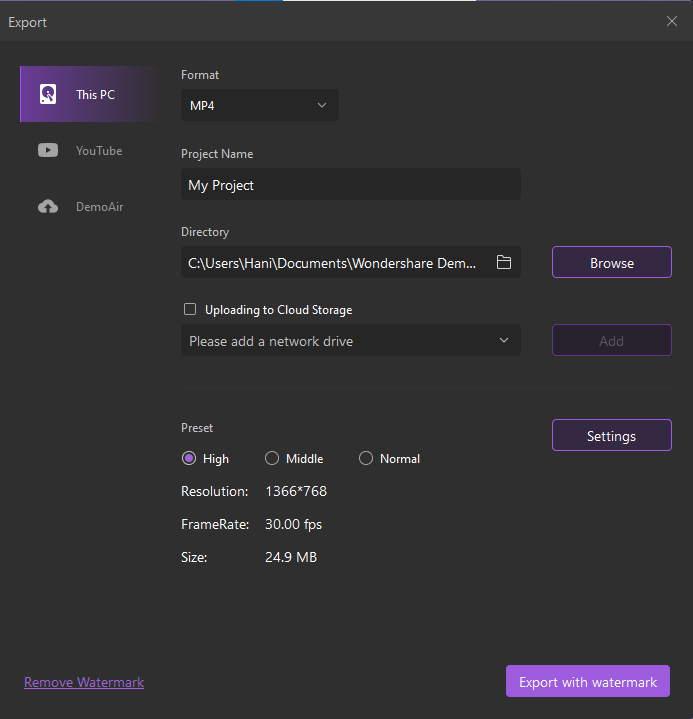
Export:
- You can also export it by clicking on the”Export.”
- Select format, location, project name, resolution, frame rate, size, etc.
- In the end, click on export.
- You can also upload it to YouTube.

Pros:
- Multiple features
- Multiple formats Input
- Flexible
- Record with Webcam and microphone
- Add captions
- Add stickers
- Record multiple screens
- Easy-to-use
Cons:
- To use advanced features, you will have to buy its subscription.
Screen Recording Made Easier on Windows 10:
Screen recording is when you record a video and audio of your on-screen exertion, allowing users on the other end of the connection to see the information the same way as the sharer. With screen recording videos, you can:
- Nearly walk people through your study process or tech issue using dynamic videotape of your recorded screen.
- Apply it across utmost industries deals,business, education, marketing, etc.
- Share vital and sensitive on-screen information with clients and co-workers by mirroring your screen.
So, the wait is over. Go and download Creator and create any type of content.
-
-
-

-

-

-