There’s something undeniably satisfying about a glass filled with perfectly crushed ice — whether it’s cooling a craft cocktail, refreshing a summer slushie, or elevating a seafood presentation at your next dinner party. Crushed ice has become a staple for home entertainers and beverage enthusiasts alike, yet achieving that ideal texture consistently has long been a frustrating challenge. Enter modern ice maker technology: a game-changing solution that transforms how we produce crushed ice at home. This guide walks you through everything you need to know about making perfect crushed ice efficiently using today’s most innovative appliances. Whether you’re a tech-savvy homeowner upgrading your kitchen setup or someone who simply demands better results from their gadgets, you’ll discover how these machines deliver on-demand crushed ice with minimal effort. From understanding the underlying technology to mastering operation and maintenance — including features like accessible reservoirs and convenient drainage points — this comprehensive resource ensures you get the most from your investment while keeping your appliance running flawlessly for years to come.
Table of Contents
Understanding Ice Maker Technology for Superior Crushed Ice
Ice maker technology represents a significant leap from the days of filling plastic trays, waiting hours for water to freeze, and then wrestling with a mallet or Lewis bag to break cubes into uneven shards. At its core, modern ice maker technology uses a rapid freezing cycle — circulating refrigerant through evaporator plates or cylindrical molds — to produce ice in minutes rather than hours. What sets crushed ice-capable machines apart is the addition of a built-in crushing mechanism, typically a set of stainless steel blades or auger-style grinders that break formed ice into consistently sized fragments immediately after production.
The evolution has been remarkable. Early countertop ice makers could only produce bullet-shaped cubes, leaving users to crush them manually. Today’s systems integrate the entire workflow — freezing, harvesting, and crushing — into a single automated cycle controlled by microprocessors that monitor temperature, water flow, and ice density in real time. Key components driving this performance include compressor-driven cooling systems for rapid freeze times, precision water pumps that control ice thickness, and variable-speed crushers that let users dial in their preferred texture from coarse snow-like consistency to chunky pebble-style fragments.
For tech-savvy users, the appeal goes beyond convenience. These appliances often feature digital interfaces, programmable timers, and sensor-driven diagnostics that alert you to filter changes or maintenance needs before problems arise. Ice maker technology has transformed crushed ice production from a labor-intensive chore into a push-button experience that delivers repeatable, restaurant-quality results every single time.
Types of Ice Makers and Their Crushing Capabilities
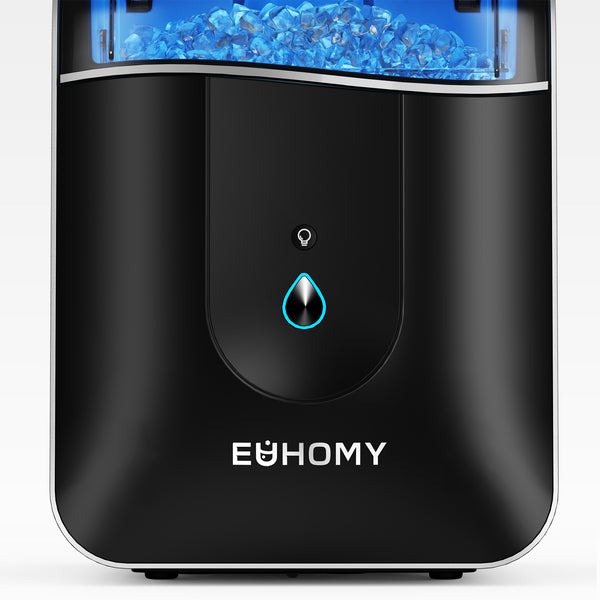
Countertop ice makers are the most popular choice for home users seeking crushed ice on demand — they’re portable, require no plumbing, and many now include dedicated crush modes. Brands like Euhomy have made countertop models particularly accessible, offering compact designs with multiple ice size options that fit seamlessly into modern kitchens. Built-in undercounter models offer higher production volumes and often connect directly to water lines, making them ideal for frequent entertainers. Some premium units feature adjustable texture settings, allowing you to toggle between fine crush for frozen cocktails and coarser fragments for icing down bottles. Portable bullet-ice makers with integrated crushers strike a middle ground, while commercial-grade nugget ice machines produce chewable pebble ice that’s already semi-crushed by design.
Step-by-Step Guide: How to Make Crushed Ice with Your Ice Maker
Learning how to make crushed ice with a dedicated ice maker is refreshingly straightforward once you understand the workflow. Unlike traditional methods that require separate freezing and crushing steps, modern machines consolidate everything into a streamlined process that delivers results in minutes. The key is proper preparation, correct mode selection, and understanding your machine’s rhythm so you can produce exactly the volume and texture you need — whether that’s a single glassful for a mojito or enough to fill a party cooler.
Start by positioning your ice maker on a flat, stable surface with adequate ventilation around the unit — most models require at least three inches of clearance on all sides to prevent the compressor from overheating. Ensure the unit is near a power outlet and, if your model isn’t plumbed in, have filtered water ready to fill the reservoir. Using filtered or distilled water isn’t just a suggestion; it dramatically improves ice clarity, taste, and reduces mineral buildup inside the machine. Fill the reservoir to the indicated maximum line without overfilling, as excess water can interfere with the freezing cycle or trigger overflow sensors.
Power on the machine and allow it to run through any initial diagnostic cycle — many units perform a brief self-check that takes thirty to sixty seconds. Once ready, select the crushed ice mode using your machine’s control panel. Some models offer a single crush setting, while others present a spectrum from fine to coarse. For cocktails and slushies, fine crush works best because it melts evenly and blends seamlessly with liquids. For icing seafood or chilling bottles, coarser fragments provide longer-lasting cooling without excessive melt.
Initiate the cycle and let the machine work uninterrupted. Most countertop units produce their first batch of crushed ice within eight to fifteen minutes. Avoid opening the collection bin repeatedly during production, as this introduces warm air that slows the freezing process. When the bin reaches capacity, a sensor typically pauses production automatically — simply scoop out what you need and the machine resumes. For continuous high-volume needs, keep a secondary insulated container nearby and transfer completed batches to maintain production flow.
Safety matters throughout this process. Never insert hands or utensils into the crushing mechanism while the unit is powered on. If ice jams occur, power down completely before attempting to clear the blockage. Keep the area around the machine dry to prevent slipping hazards from condensation or minor splashes during water filling. With these fundamentals in place, making crushed ice becomes an effortless routine that integrates naturally into your entertaining or daily beverage preparation.
Preparing Your Ice Maker for Crushed Ice Production
Before your first batch, run a complete cleaning cycle using the manufacturer’s recommended solution — this removes any manufacturing residues or dust from shipping. After rinsing thoroughly, perform a calibration run by producing one full cycle of ice and discarding it. This primes the water lines and ensures the internal temperature stabilizes at optimal freezing levels. Check that the crushing blades or auger mechanism spins freely by listening for smooth operation during the initial cycle. If your model includes a water filter, install it before adding water to the reservoir. Position the collection bin correctly — misalignment can cause crushed ice to scatter or jam the dispensing chute. Finally, verify that all removable parts are locked securely in place, as loose components can trigger safety shutoffs or produce inconsistent results.
Operating the Crushed Ice Function: Best Practices
Once setup is complete, operating the crush function becomes intuitive. Press and hold the ice type selector until the crushed ice indicator illuminates — on digital models, the display confirms your selection. Most machines begin producing within seconds of cycle initiation. Collect ice promptly from the bin to prevent pieces from fusing together in a solid mass, especially in humid environments. If your unit offers size or texture adjustments, experiment with small batches first to identify your preferred setting before committing to large-volume production. Time your cycles to align with when you actually need the ice, since crushed ice stored too long in an unrefrigerated bin begins melting and compacting within twenty to thirty minutes.
Troubleshooting Common Issues in Crushed Ice Making
If your machine produces uneven texture, check that the crushing blades aren’t obstructed by a large ice chunk that failed to break down — power off, clear the blockage, and restart. Clumping in the collection bin usually indicates the bin sat too long without being emptied; simply break apart fused pieces and resume. When production slows noticeably, inspect the water reservoir level and refill as needed. Unusual noise during crushing often signals a loose component or worn blade assembly that may need tightening or replacement. Persistent issues warrant consulting your machine’s diagnostic codes if available.
Simplifying Maintenance with Accessible Reservoirs and Drainage Points
Owning an ice maker that produces flawless crushed ice is only half the equation — keeping it running at peak performance requires consistent maintenance, and this is where thoughtful engineering makes all the difference. Modern ice makers designed for the home market have prioritized user-friendly upkeep by incorporating accessible reservoirs and strategically placed drainage points that eliminate the guesswork and frustration traditionally associated with appliance maintenance. These design choices mean you spend less time disassembling components and more time enjoying perfectly crushed ice.
Regular maintenance isn’t optional if you want your machine to deliver clean-tasting, crystal-clear crushed ice batch after batch. Mineral deposits from water, biofilm from stagnant moisture, and residual particulates can accumulate surprisingly fast — particularly in the reservoir where water sits before entering the freezing cycle. Left unchecked, these buildups affect ice flavor, reduce production efficiency, and can eventually damage internal components. The good news is that machines engineered with accessible reservoirs allow you to reach every interior surface without specialized tools or professional service calls. Most quality units feature lift-out or slide-out reservoir designs that expose the full interior for wiping, soaking, and inspection in under a minute.
Drainage points serve an equally critical function by providing a controlled path for flushing cleaning solutions, draining stale water, and preventing moisture from pooling in areas where mold and bacteria thrive. Rather than tipping the entire unit or using makeshift siphoning methods, a well-placed drain plug or valve lets you empty the system completely with gravity doing the work. Establishing a maintenance routine — weekly reservoir rinses, monthly deep cleans with food-safe descaling solution, and quarterly drain line flushes — keeps your ice maker hygienic and extends its operational lifespan significantly.
Cleaning Accessible Reservoirs for Hygiene and Performance
To clean your reservoir effectively, first power down the unit and unplug it. Remove the reservoir according to your model’s design — most detach with a simple lift or slide motion without requiring any tools. Empty any remaining water, then fill the reservoir with a mixture of warm water and a food-safe descaling agent or a solution of one part white vinegar to three parts water. Let this soak for fifteen to twenty minutes to dissolve mineral scale and loosen any biofilm. Use a soft, non-abrasive cloth or sponge to wipe all interior surfaces, paying close attention to corners and inlet ports where deposits concentrate. Rinse thoroughly with clean water at least twice to ensure no cleaning solution remains. Before reinstalling, inspect the reservoir walls for discoloration or persistent residue that might indicate the need for a longer soak or a replacement filter upstream. This entire process takes roughly ten minutes and dramatically improves both ice taste and machine longevity when performed weekly.
Utilizing Drainage Points to Prevent Water Accumulation
Drainage points are typically located at the base or rear-bottom of your ice maker, identifiable as small plugs, twist caps, or valve spigots. To use them, place a shallow tray or towel beneath the drain, then open the plug to release standing water from the internal system. This is particularly important before storage, after cleaning cycles, or if the machine won’t be used for several days. Stagnant water left inside creates an ideal environment for mold growth and unpleasant odors that transfer directly into your ice. After draining, leave the plug open briefly to allow air circulation that dries residual moisture from internal channels. For machines with gravity-fed drains, ensure the unit sits level so water flows completely toward the drainage point rather than pooling in low spots. Periodically inspect the drain opening for mineral crust or debris that could restrict flow — a pipe cleaner or small brush clears obstructions quickly. This simple habit prevents the most common hygiene complaints ice maker owners encounter.
Why Tech-Savvy Users Prefer Ice Maker Technology for Crushed Ice
For users who gravitate toward innovation and efficiency in every corner of their home, ice maker technology represents exactly the kind of intelligent appliance investment that pays dividends daily. The appeal starts with automation — rather than babysitting a manual process or settling for inconsistent results, these machines deliver precisely textured crushed ice on demand with a single button press. That predictability matters when you’re hosting guests or crafting drinks where ice quality directly impacts the final product.
Time savings compound quickly. Traditional crushed ice methods — freezing trays for hours, transferring cubes to bags, hammering them into submission — consume fifteen to twenty minutes of active effort for mediocre results. A dedicated ice maker collapses that entire workflow into under ten minutes of completely hands-off production. For busy professionals who value their time, this efficiency translates into more moments spent enjoying the result rather than laboring over the process.
Integration with modern kitchen ecosystems adds another layer of appeal. Many current-generation ice makers feature Wi-Fi connectivity, app-based monitoring, and compatibility with smart home platforms that let you start ice production remotely or receive alerts when the bin is full. Some models track usage patterns and suggest optimal cleaning schedules based on actual production volume rather than arbitrary calendar reminders. This data-driven approach to appliance management resonates deeply with users who expect their devices to communicate intelligently.
Low maintenance design seals the deal. Accessible reservoirs, tool-free disassembly, and self-cleaning modes mean upkeep demands minutes per week rather than hours per month. For technology enthusiasts who appreciate elegant engineering solutions, these machines exemplify how thoughtful design eliminates friction between user and outcome — delivering restaurant-quality crushed ice with the effortless reliability that defines a truly smart kitchen.
Elevating Your Home Ice Experience with Smart Ice Maker Technology
Making perfect crushed ice at home is no longer a matter of brute force and improvisation — ice maker technology has elevated the entire process into a seamless, automated experience that delivers consistent results every time. From understanding how rapid freezing cycles and integrated crushing mechanisms work together, to following a straightforward operational workflow that produces your preferred texture in minutes, these machines eliminate the frustration that once defined crushed ice preparation. Equally important, features like accessible reservoirs and well-positioned drainage points transform maintenance from a dreaded chore into a quick weekly habit that preserves both ice quality and machine longevity. For tech-savvy users who expect their kitchen appliances to be as intelligent and efficient as the rest of their connected home, dedicated ice makers represent a practical investment that saves time, reduces effort, and consistently impresses guests. As kitchen innovation continues advancing toward greater automation and smarter diagnostics, the humble ice maker stands as proof that even the simplest pleasures — a perfectly chilled drink on a warm evening — benefit enormously from thoughtful engineering and modern design.
-

-

-

-

-

-